Four easy steps to organize medicine and time saving medicine storage ideas
Kids are back in school and a change in seasons is around the corner. Often time that means a cold is picked up in school or allergies come back in full force. When you are in need of some cold medicine in the middle of the night or your kid needs a bandaid from a playground fall are you able to quickly find what you need? Or do you spend time rummaging through the medicine cabinet only to find medicine expired a year ago?
There’s no better time to organize your medicine as Fall approaches so that you are prepared and less stressed when illness hits. Organizing your medicine doesn’t have to be an overwhelming task. Here are 4 easy tips to follow when organizing a medicine cabinet:
Step 1: Empty & Edit
Take all of the medicine out of the space/cabinet. Collect medicine that is stored in other places around the house so you can holistically look at the medicine on hand. As you take the medicine out of the space, check the expiration dates and set aside anything expired. You will want to toss any medicine that has expired as the medicine is no longer effective. Many communities have programs that take back prescription drugs (click here to find one in your community). According to the FDA, many medicines can be thrown in the household trash if mixed with coffee grounds or kitty litter and then put in a sealed storage bag.

Step 2: Categorize your Medicine
The next step is grouping your medicine by category or ailment. If you have kids, I highly recommend grouping (and storing) their medicine separate from adult medication. This way you can get your kids what they need quickly (don’t you find that kids have no patience when they are sick?) and you don’t risk a chance of giving them an adult version of the medication.
Once kids and adult medication is separated out, I then recommend grouping medicine into the following categories/ailments:
Cold/Flu
Cough/Sore Throat
Sinus
Digestion
Itch/Skin
Fever (thermometer, advil/tylenol)
First Aid (bandaids, gauzes, ointment)
Item used to treating a specific & ongoing ailment
This may seem excessive but having micro categories of medicine really helps you easily find what you need when you need it and reduces the chance of overbuying medicine. If you have a specific thing you are treating (i.e. an eye issue) that involves using multiple items to treat it, it is helpful to group those items together in its own category.

Step 3: Store
Once you have categorized, it’s time to determine where medicine should be stored in your house. Picking a central place to store medicine helps the whole family know where to find it and reduces chance of overbuying when everything is stored together. A bathroom linen closet, a kitchen cabinet, or in a cabinet in a bathroom most of your family uses are all great options for storing medicine. I recommend storing your prescription/vitamins in a visible place like on your bathroom sink vanity/counter and keeping the general medicine in a separate/less visible area. Store medicine at a height that is at the appropriate level of accessibility if you have young kids in the house.

Step 4: Contain & Label
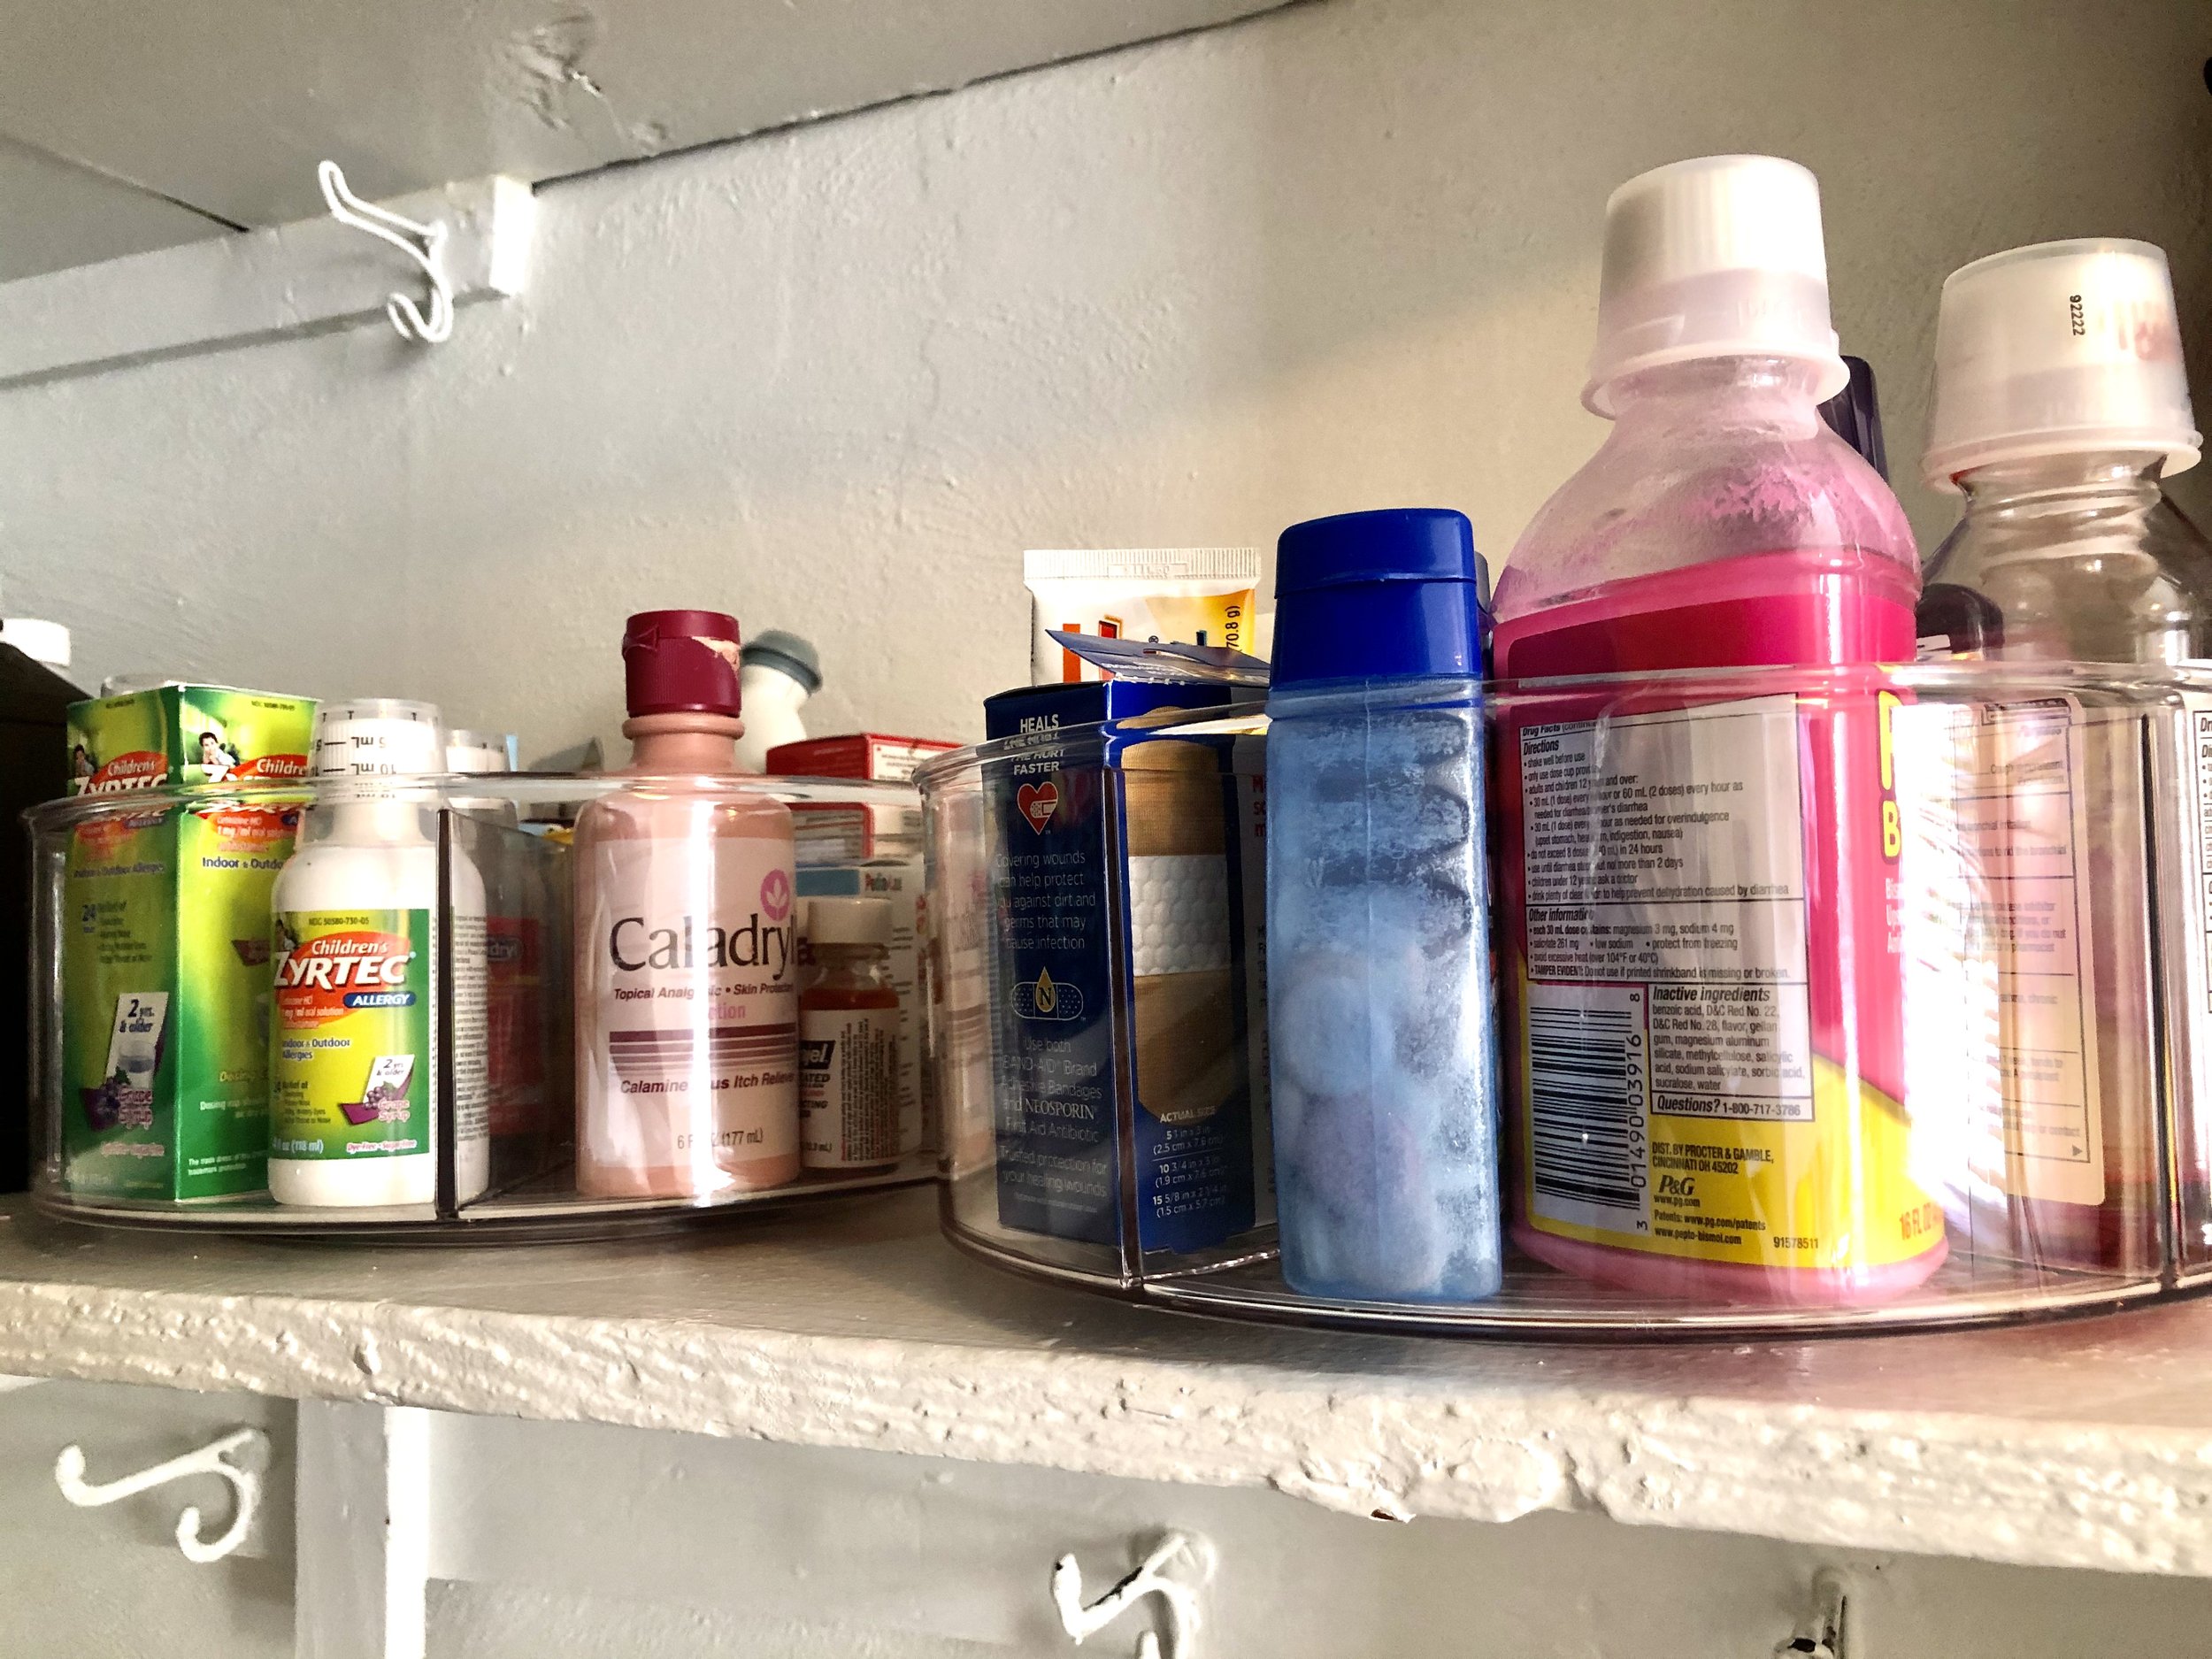
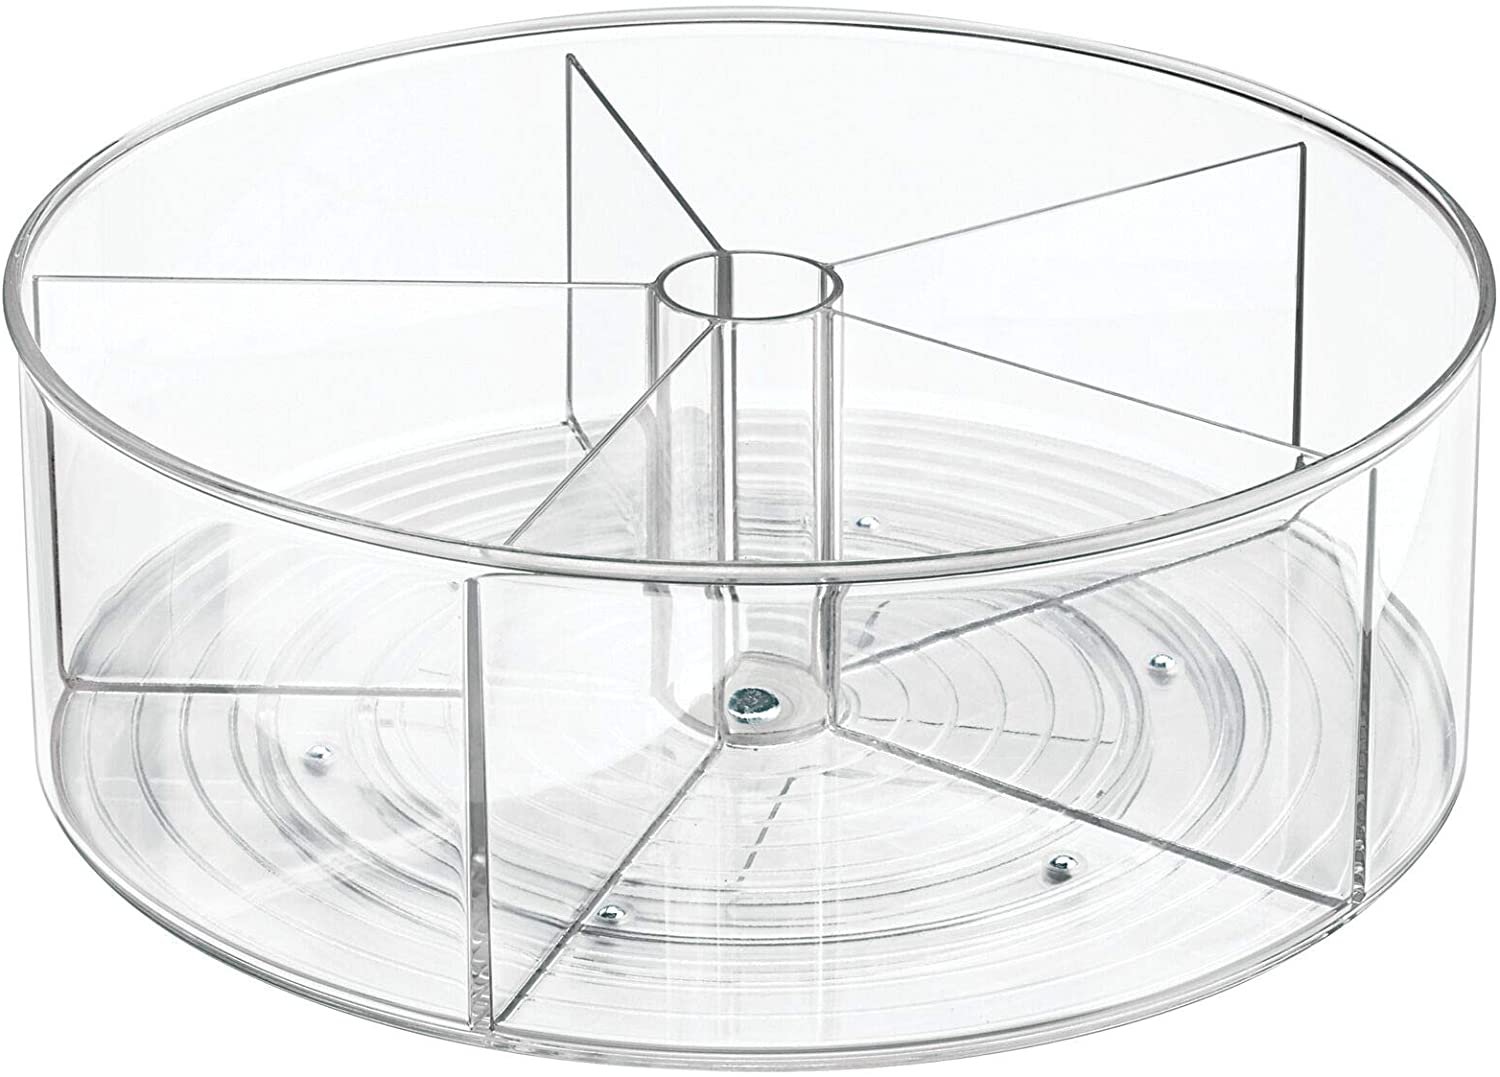
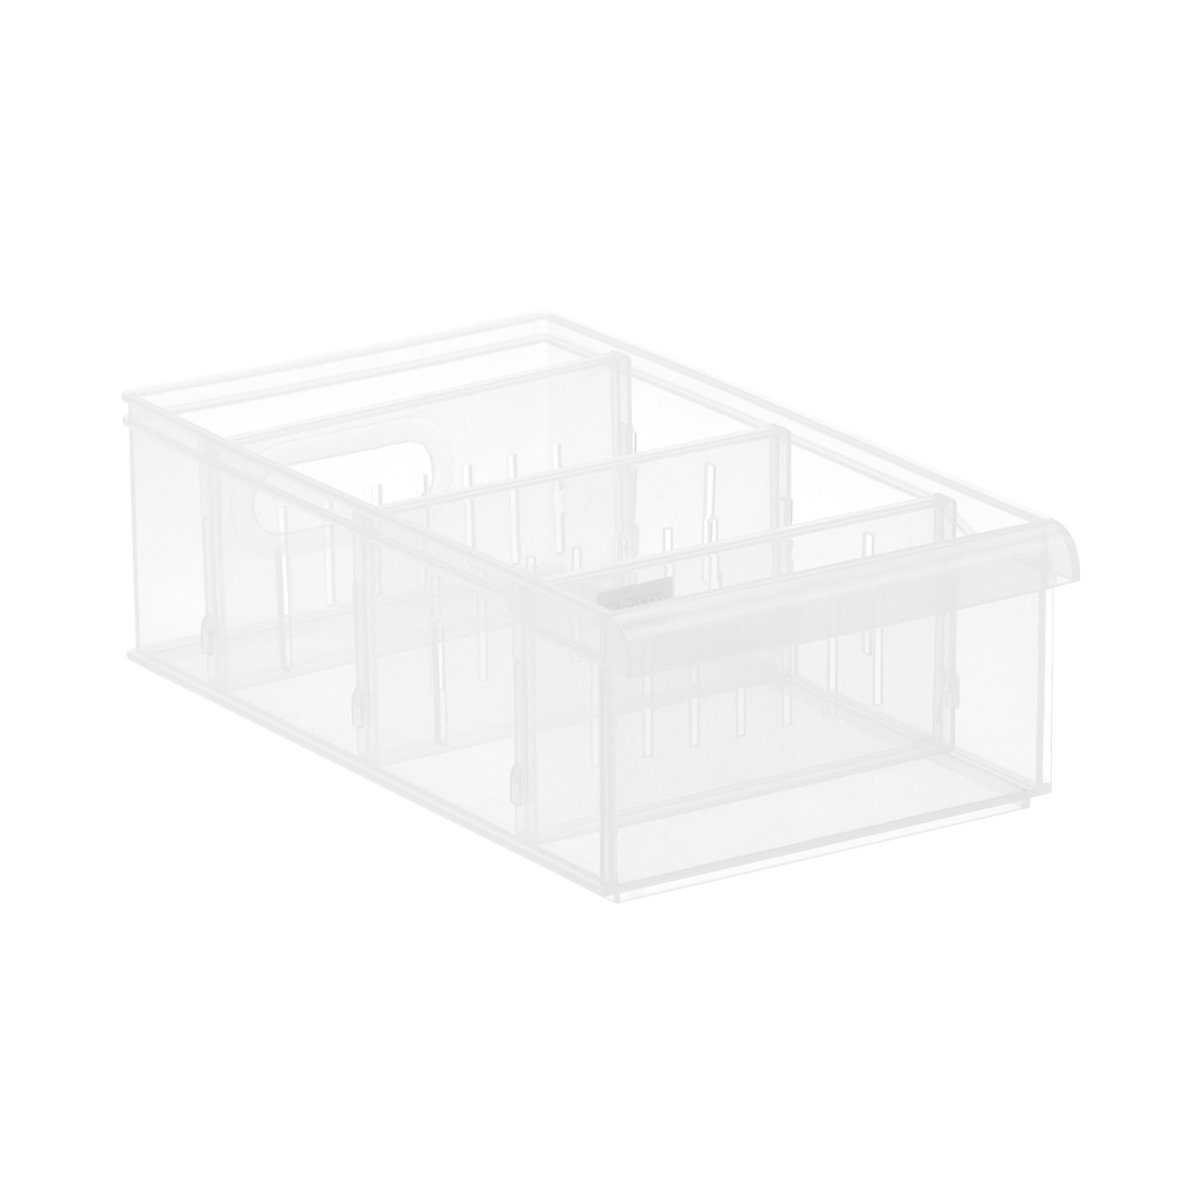
After determining where to store your items, choose bins to store your medicine based on the amount of space you have. My two favorite containers to use when storing medicine are a divided turntable and a divided stackable bin. Using a bin with dividers helps you keep medicine corralled with its “category” without needing dedicated bins for each ailment.
Here is the divided turntable used in a bathroom- one for adult medicine and the other for kids medicine. I love turntables because you can easily see everything you have and nothing gets pushed to the back of a bin.
Here is the stacking bin (medium and small size) used in a bathroom. The front of the bin is labeled with the ailment and the adjustable dividers help separate the categories. Most medicine fits on one shelf here. which is a great space saver.

After containing medicine in a bin, the last step is labeling. I like labeling based on the “ailments” determined in Step 2. You can label each section on the outside of the turntable or label the front of the divided bin. You can use chalkboard tape and washi tape for labeling if you don’t have a labelmaker.
Just like organizing anything else in your house, your new system only works if it is maintained. Try to go through your new medicine bins every 6 months to check expiration. Try not to stock up on medicine too much so you use before medicine expires. Try to buy medicine based on what will fit in the space that you have.
I hope these four simple steps to organize medicine have been helpful and save you a lot of stress and time this Back to School/Fall season! What tip was most helpful to you? Let me know in the comments below!